How to Connect to a SOAP API from Azure Data Factory
Have you ever needed to read data from a SOAP API (web service) in your Azure Data Factory pipelines? I have, and I will here show you the trick how to do this.
Azure Data Factory (ADF) doesn't currently come with any built-in SOAP connector. This has been requested, but for now you need to do a kind of workaround to read from SOAP APIs.
The trick is the use the general HTTP connector. Configuring it for SOAP can be a bit tricky. I will show you how I configured it.
Step 1 - Create Linked Service
Begin by creating a linked service. Select the HTTP connector.

Give a name to your linked service and add information about Base URL. Also select Authentication type, which should be Anonymous if you don't have any authentication credentials.

Step 2 - Create Dataset
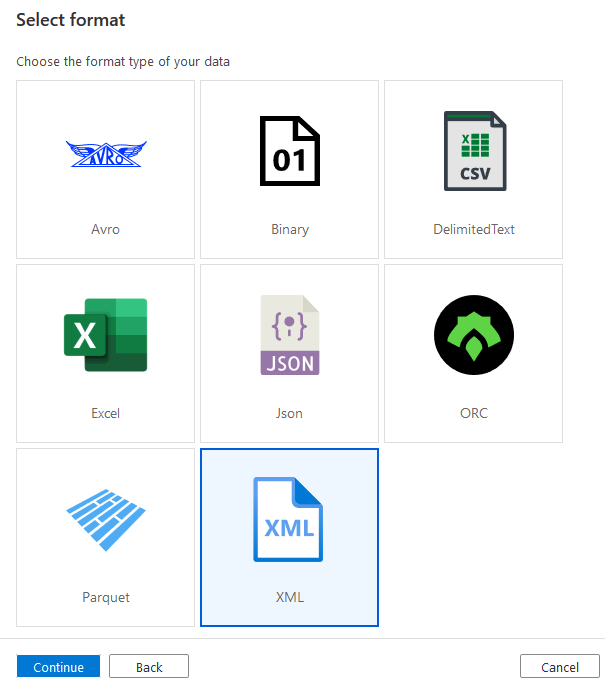
Create a new dataset for your API. Choose the HTTP type again and then select XML format.
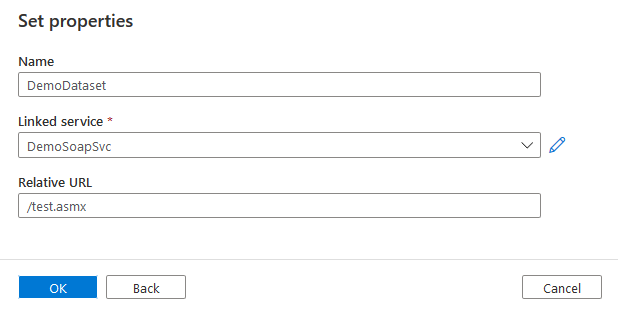
Point your dataset to your linked service and enter the Relative URL.
Step 3 - Create Pipeline
To use your SOAP API connector, create a pipeline. Then add a Copy Data-activity and go to the Source tab.
Select your newly created dataset and change the Request method to POST.
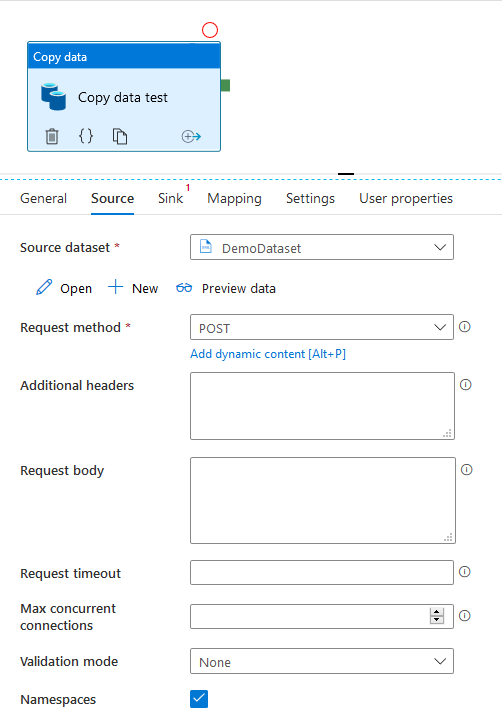 The question is what should go into Additional headers and Request body. This is the trickiest part!
Step 4 - Determine SOAP Headers and Body
To create the headers and body, it is easiest to use a SOAP testing tool. I recommend using SoapUI, which is a free and open source tool by SmartBear. Below is how to use this tool to create the headers and body.
When SoapUI starts, it will show an "Endpoint Explorer". Just close that window and instead click New SOAP Project.
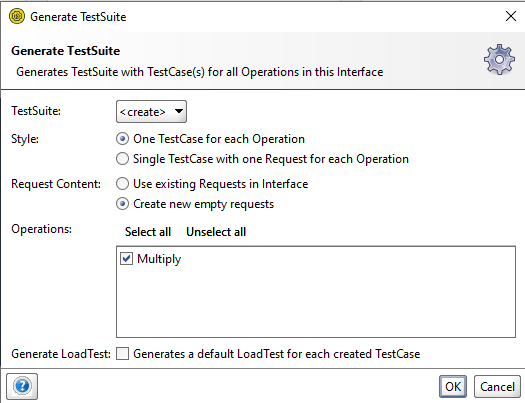
Enter the URL of the WSDL for your SOAP service. Usually you get it by adding ?WSDL to the URL of the SOAP service. Also enable the "Create TestSuite" checkbox.

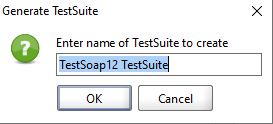
Now accept the default settings in the dialogs that appear for the TestSuite. Make sure your desired operation is included.
And just accept the name.
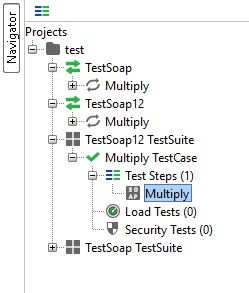
Finally, expand the TestSuite in the Navigator and double-click on the API operation you wish to use.
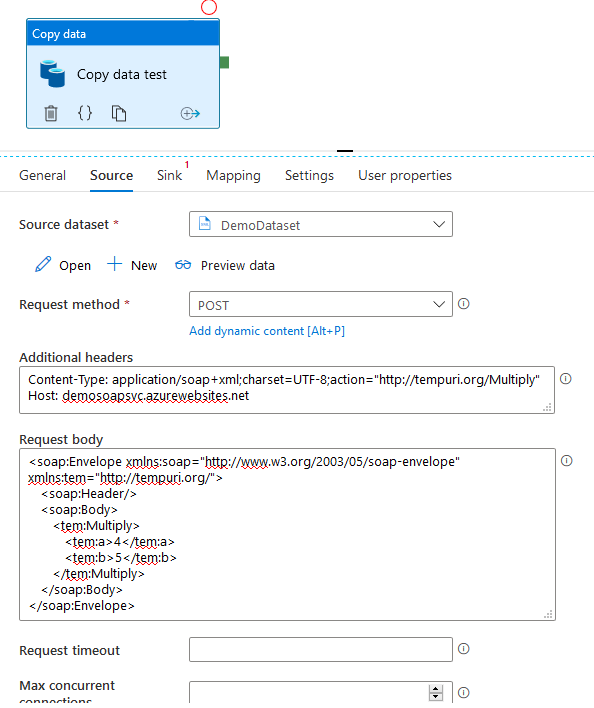
You now first get the body. Copy/paste this into the Request body of your Copy Data activity in Azure Data Factory.
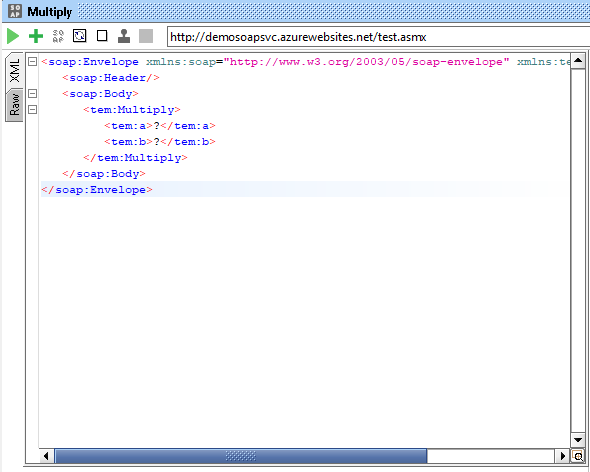
Then enter some sample data instead of the question marks and execute the SOAP request by clicking the play icon on the top left.
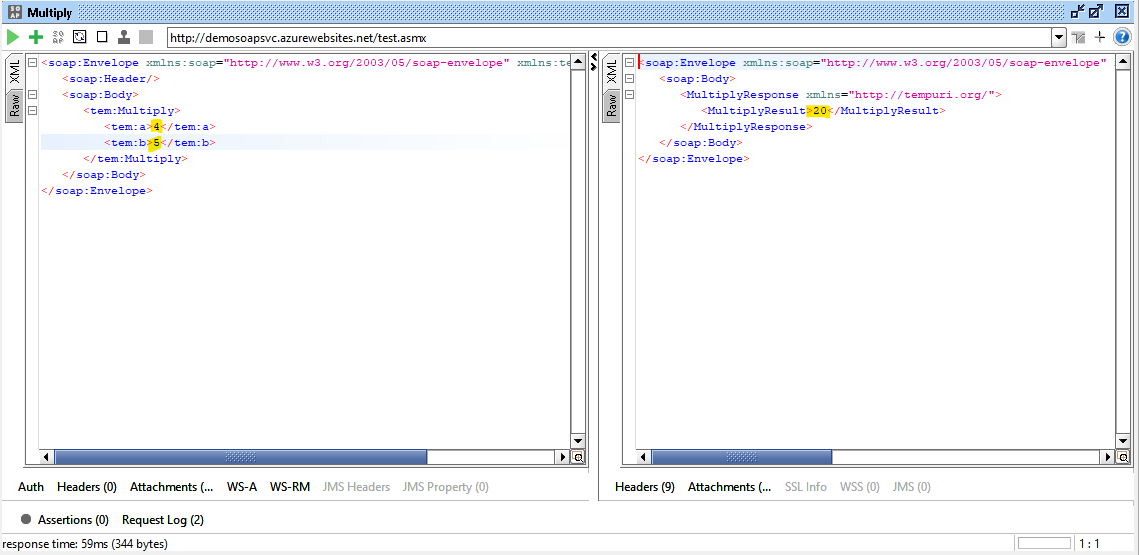
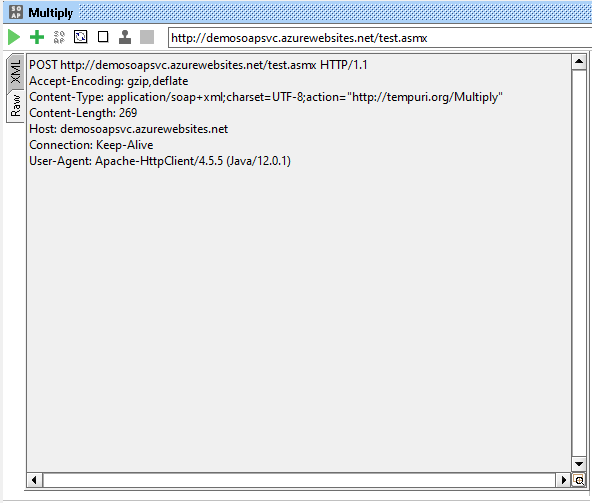
Now switch to the Raw tab on the left to show the headers. Copy/paste the headers for Content-Type and Host into your Azure Data Factory Copy Data activity.
Final results
Your Copy Data activity should now look something like this. You can now click Preview data to test it.
Parameterize your SOAP query
You may want to use parameters in your SOAP request. No problems. Just click on "Add dynamic content" under the Request body and enter something like this.
1@{replace(replace('<soap:Envelope xmlns:soap="http://www.w3.org/2003/05/soap-envelope" xmlns:tem="http://tempuri.org/">
2   <soap:Header/>
3   <soap:Body>
4      <tem:Multiply>
5         <tem:a>?p1</tem:a>
6         <tem:b>?p2</tem:b>
7      </tem:Multiply>
8   </soap:Body>
9</soap:Envelope>', '?p1', pipeline().parameters.p1), '?p2', pipeline().parameters.p2)}
In the example above, ?p1 and ?p2 and simply placeholders for your parameters. They are replaced with the actual values of the parameters by the replace method. Note that the replace method requires the parameters to be strings. If they are of other types, just add a method to convert them to strings.
That's it! Good luck.