Introduction to Azure Synapse Serverless SQL pools
Azure Synapse is a super-scalable analytics service for enterprise data warehousing and Big Data analytics. It gives you two options: Dedicated SQL pool or Serverless on-demand resources. This article will describe the Serverless SQL pool.
Azure Synapse Serverless SQL Pool is a query service that works with Azure Data Lake. It enables you to access data through standard T-SQL syntax and standard protocols. This makes your data available from a wide range of Business Intelligence tools (such as Power BI). Serverless SQL Pools have a MPP (Massively Parallel Processing) architecture, which can analyze huge amounts of data in seconds to minutes. Since it is serverless, you are only charged for the data processed by your queries.
Creating your Azure Data Lake Storage
You will need an Azure Data Lake Storage (Gen2) to serve as storage for your Azure Synapse workspace. In this introduction, I will also use the same Azure Data Lake Storage for storing demo data that you can run queries against.
I recommend starting with a blank Storage account. In the Azure Portal, click "Create a resource" and then select "Storage account".
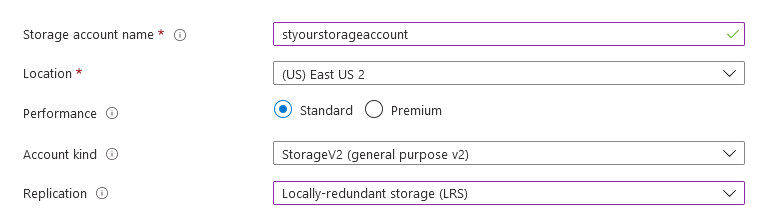
- Choose StorageV2
- Choose Locally-redundant storage (LRS) if you want to keep down costs
- On the Advanced tab under Data Lake Storage Gen2, set "Hierarchical namespace" to Enabled.
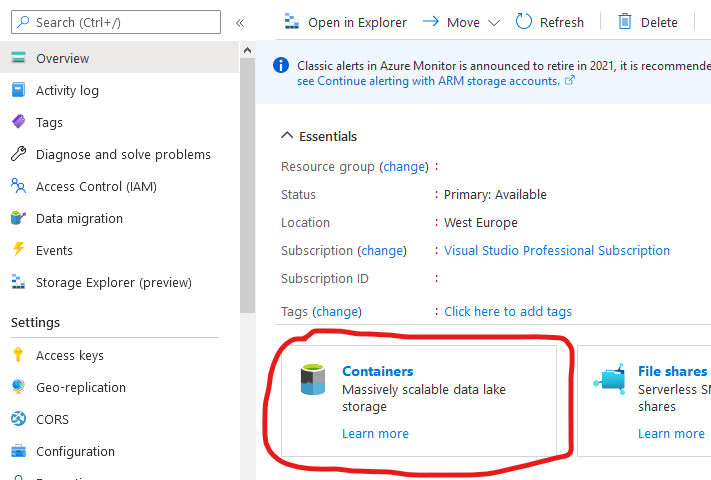
After your Storage Account has been created, go to the Containers screen.
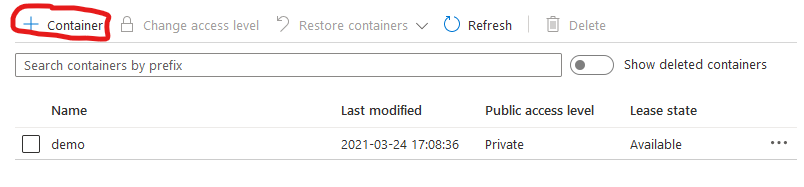
Then add a container named "demo".
Creating your Azure Synapse Analytics Workspace
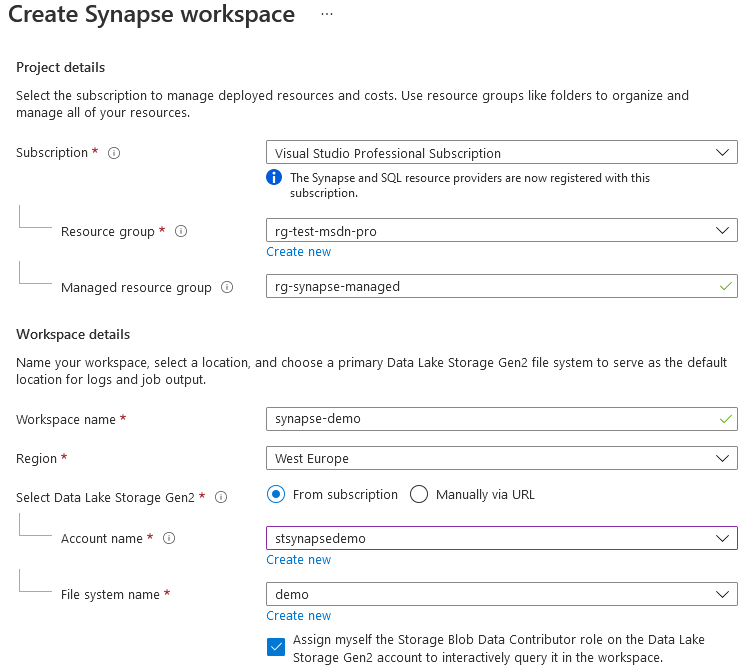
Next, let's create the Azure Synapse workspace. Search for Azure Synapse Analytics and click create.
Under "Select Data Lake Storage Gen2", select the storage account that you created previously. Under "File system name", select the container you created.
Complete the next step. For testing purposes, you won't need double encryption.
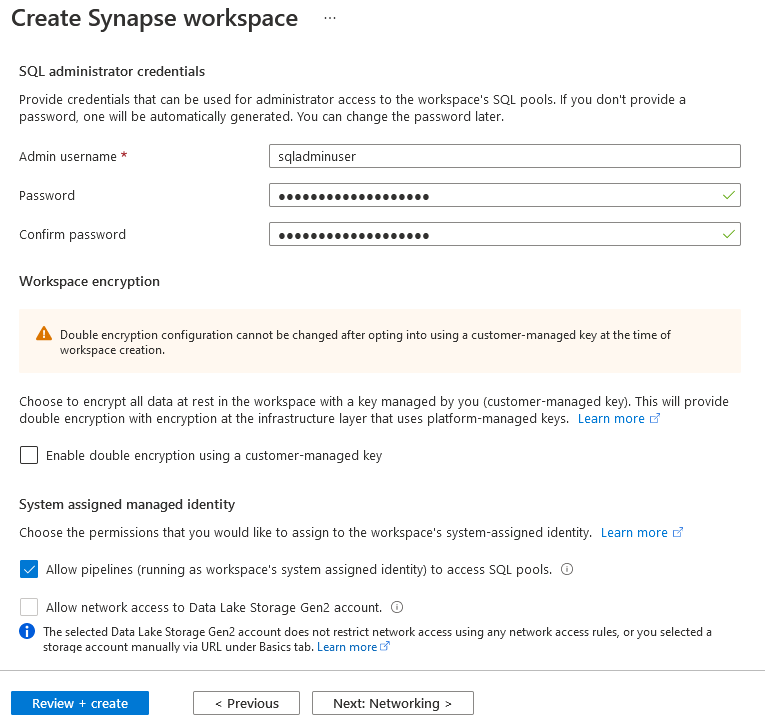
Complete the remaining steps and confirm the creation of your Synapse workspace.
Creating your Sample Data
Let's now create some sample data for running your Azure Synapse SQL queries.
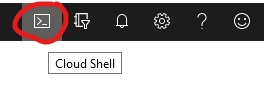
One way to quickly create some random data is to generate it from PowerShell. You have PowerShell easily available from the portal by the CloudShell feature.
This will give you a terminal windows like below.
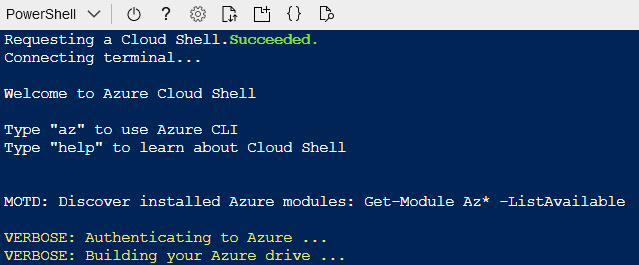
Now you can copy the script below, modify it with your resource names and paste it into the CloudShell terminal window. It should create your sample test files in less than a minute.
 1$resourcegroup = "your resource group"
 2$account = "your storage account"
 3$container = "demo"
 4$folder = "~/demodata"
 5$numberoffiles = 10
 6$linesperfile = 10000
 7
 8if(!(Test-Path -path $folder))
 9{
10    New-Item -ItemType Directory -Path $folder
11}
12
13Set-AzCurrentStorageAccount -ResourceGroupName $resourcegroup -Name $account
14
15for ($i = 0; $i -lt $numberoffiles; $i++)
16{
17    $filename = "sales$((Get-Random 1000000).ToString("D6")).txt"
18    $path = "$folder/$filename"
19    Write-Output "Creating file $path"
20
21    $content = "Date`tRegionID`tProductID`tQuantity`r`n"
22    for ($l = 0; $l -lt $linesperfile; $l++)
23    {
24        $content += "$((Get-Date).AddDays((Get-Random 365) - 365).ToString("yyyyMMdd"))`t$((Get-Random 10) + 1)`t$((Get-Random 25) + 1)`t$((Get-Random 1000) + 1)`r`n"
25    }
26    Set-Content -Path $path -Value $content
27
28    Write-Output "Uploading file $path"
29    Set-AzStorageBlobContent -Container $container -File $path -Blob $filename
30
31    Remove-Item -Path $path
32}
It will generate 10 files, each with 10000 lines of test data. They will be uploaded into your Data Lake.
Setting up your Database and Data Source
Open Synapse Studio
First click on your newly created Synapse Workspace.

Then click to Open Synapse Studio.

Create SQL Script
In Azure Synapse Studio, start by clicking on the Develop tab.
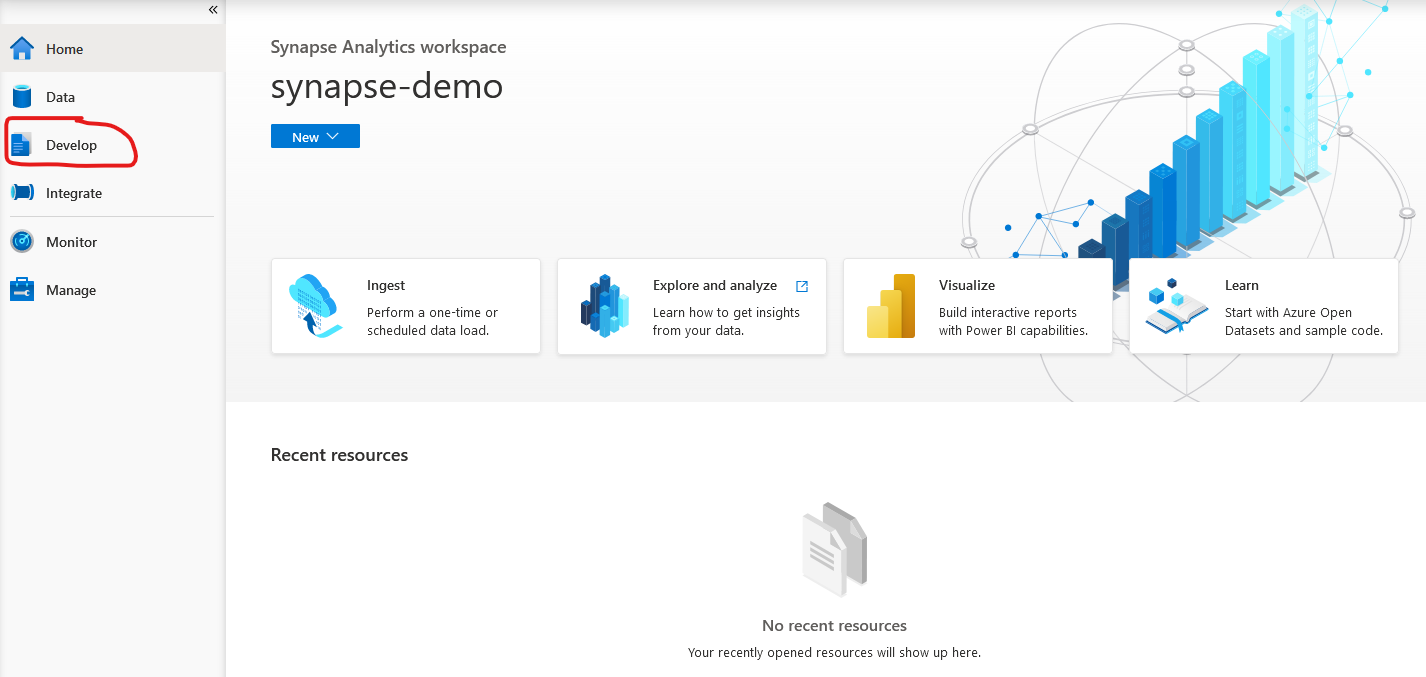
The create a new SQL Script.
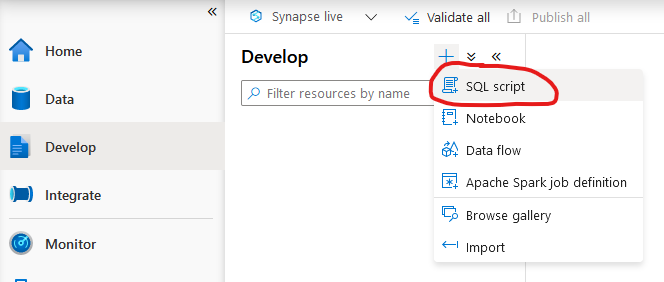
Now you get an empty script that you can edit and run. This will be the place where you run the following SQL statements.
Create Database
By default, Azure Synapse Serverless SQL queries will run against the master database of your pool. It is better to create your own user database. To create your database, run this code in your SQL script:
1CREATE DATABASE demo
Click the refresh button. Your database should become available in the "Use database" list.

Create Data Source
Although you can access the Data Lake directly from your queries without creating any data source, it is better to create one. Run the following SQL script:
1CREATE EXTERNAL DATA SOURCE [demo]WITH ( LOCATION = 'https://yourstorageaccountname.blob.core.windows.net' );
Make sure you run the script inside your user database (not the master database).
Running your first Azure Synapse Serverless SQL query
If you have completed all the previous steps, you can now easily run queries against your test data!
Try running this SQL script:
 1SELECT
 2    TOP 100 *
 3FROM
 4    OPENROWSET(
 5        BULK '/demo/sales*.txt',
 6        DATA_SOURCE = 'demo',
 7        FORMAT = 'CSV',
 8        PARSER_VERSION = '2.0',
 9        FIELDTERMINATOR = '\t',
10        ROWTERMINATOR = '\n',
11        HEADER_ROW = TRUE
12    )
13    WITH ([Date] [int], [RegionID] [int], [ProductID] [int], Quantity [int])
14    AS [sales]
15;
You can omit the WITH-clause if you wish, because Azure Synapse can autodetect the columns from your files. However, I recommend you do include it so you ensure you have control of your schema.
Notice the wildcard (sales*.txt), which means Azure Synapse will read ALL files matching that pattern.
There are currently two version of the parser. Version 2.0 is the fastest, so I recommend using it.
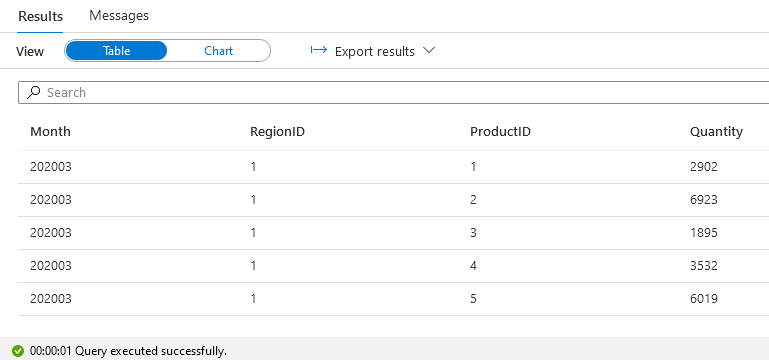
Now let's also try grouping and aggregating data:
 1SELECT
 2    [Month] = [Date] / 100,
 3    [RegionID],
 4    [ProductID],
 5    [Quantity] = SUM([Quantity])
 6FROM
 7    OPENROWSET(
 8        BULK '/demo/sales*.txt',
 9        DATA_SOURCE = 'demo',
10        FORMAT = 'CSV',
11        PARSER_VERSION = '2.0',
12        FIELDTERMINATOR = '\t',
13        ROWTERMINATOR = '\n',
14        HEADER_ROW = TRUE
15    )
16    WITH ([Date] [int], [RegionID] [int], [ProductID] [int], Quantity [int])
17    AS [sales]
18GROUP BY [Date] / 100, RegionID, ProductID
19ORDER BY [Date] / 100, RegionID, ProductID
20;
The output should look something like this:
Creating a View
While Serverless pools can't store data in their databases, you can create views in them that point to your data sources.
By creating views, you will make querying much easier for your users. For example you could create a view for the demo data source like this:
 1CREATE VIEW dbo.DemoSales AS
 2SELECT
 3    *
 4FROM
 5    OPENROWSET(
 6        BULK '/demo/sales*.txt',
 7        DATA_SOURCE = 'demo',
 8        FORMAT = 'CSV',
 9        PARSER_VERSION = '2.0',
10        FIELDTERMINATOR = '\t',
11        ROWTERMINATOR = '\n',
12        HEADER_ROW = TRUE
13    )
14    WITH ([Date] [int], [RegionID] [int], [ProductID] [int], Quantity [int])
15    AS [sales]
16;
Anyone could then easily query the view and do whatever they wish with the data. For example:
1SELECT
2    [Month] = [Date] / 100,
3    [RegionID],
4    [ProductID],
5    [Quantity] = SUM([Quantity])
6FROM dbo.DemoSales
7GROUP BY [Date] / 100, RegionID, ProductID
8ORDER BY [Date] / 100, RegionID, ProductID
9;
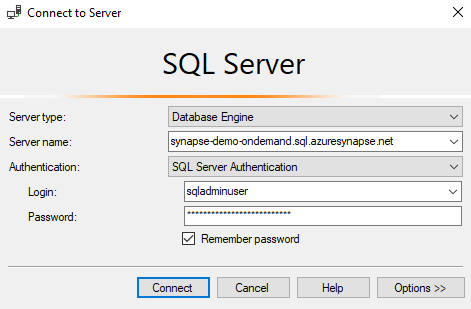
Connecting with Management Studio
A strenght of Serverless Pools is that you can continue using your standard tools. For instance, you can connect using SQL Server Management Studio.
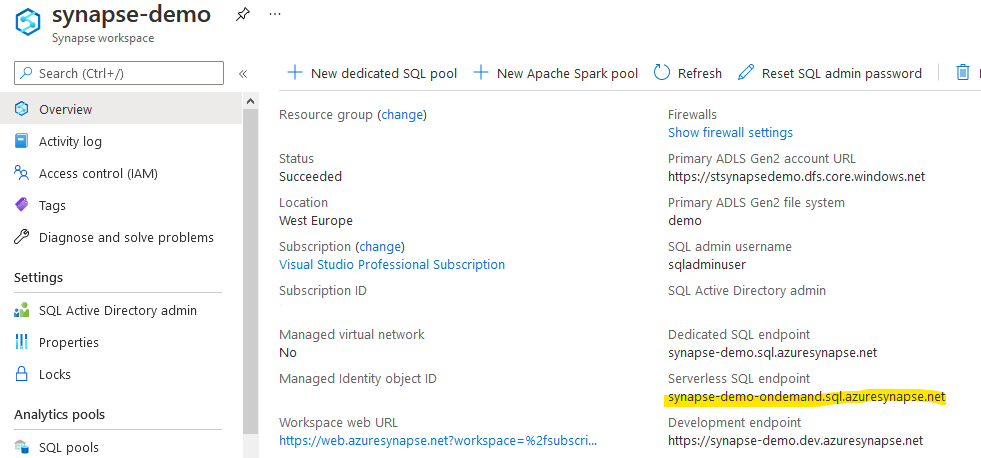
To connect, you will need to know the Serverless SQL endpoint, which you can find on the Overview page of your Synapse workspace (not Synapse Studio) in the Azure Portal.
Then you can easily connect from SQL Server Management Studio (SSMS) using the credentials that you entered when creating the Synapse workspace: