Setting up Azure Static Web Apps local development environment
An Azure Static Web Apps site consists of several services that work together: static web, API functions, authentication and authorization, and routing/redirection. Running them locally can help much with debugging and testing. This is what the new Azure Static Web Apps CLI can do for you.
Azure Static Web Apps CLI
The Azure Static Web Apps CLI is a tool that simulates the full Azure Static Web Apps runtime:
- It work as a local static web server
- It hosts your API functions
- It provides a mock authentication and authorization server
Still (as of May 2021) it doesn't read the staticwebapp.config.json, but this feature should come in a later version.
All requests are handled through one endpoint, typically http://localhost:4280, just like in a production Azure Static Web Apps site. Internally, the Azure Static Web Apps CLI acts as a proxy for the API functions as they are handled by the Functions Core Tools Runtime.
Setup
Before installing, you will need to have Node.js on your computer. It is available for download here.
Install Azure Static Web Apps CLI:
1npm install -g @azure/static-web-apps-cli
Run your first test
- Build your app using your static website generator
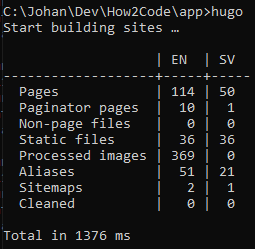
For instance, in Hugo, navigate to your app content folder and run hugo.
- Start Azure Static Web Apps CLI
Navigate to your folder where you have both the static web app and the api.
Start the CLI (replace public with the name of the output folder for your static website generator if needed).
1swa start ./app/public --api ./api
Your API functions should be built:
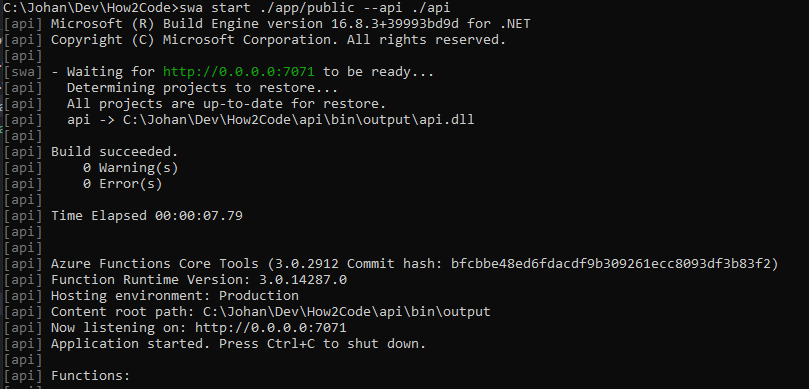
You should now get a message that the emulator has started.
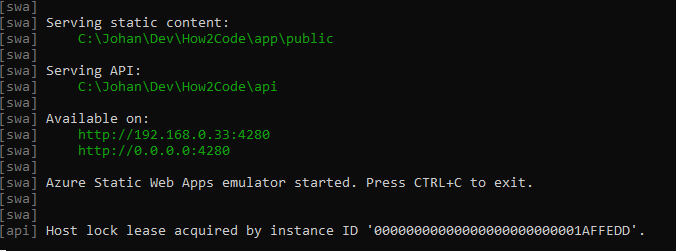
Now test navigating to localhost:4280. You should find your website!
More reading
The Azure Static Web Apps CLI also supports debugging and simulating authentication/authorization.
For learning more, I recommend visiting the Microsoft How-to guide on Azure Static Web Apps local development.
Good luck!